Exposed dropdown menus UIを個人アプリで取り入れる際、AutoCompleteTextViewを使った要素選択時の処理実装で少しだけ迷ったのでメモ程度に調べたことを記述します。
TL;DR
クリックによる要素選択時の処理にはonItemSelectedListenerではなくonItemClickListenerを使う
AutoCompleteTextView
AutoCompleteTextViewというViewがあります。 これは、複数の選択肢を表示するようなメニュー要素のUIを作りたい場合に活用できます。
Menus
Material Design Componentsの「Menus」の項目に詳細があります。
- Material.io: https://material.io/components/menus/android#exposed-dropdown-menus
- Android Developer: AutoCompleteTextView | Android Developers
上記material.ioのサイトによると、メニューには二種類のタイプがあります。
Dropdown menusはいろいろな形があるようですが、「選択肢のみを一覧で表示するような形のメニュー」という理解をしています。
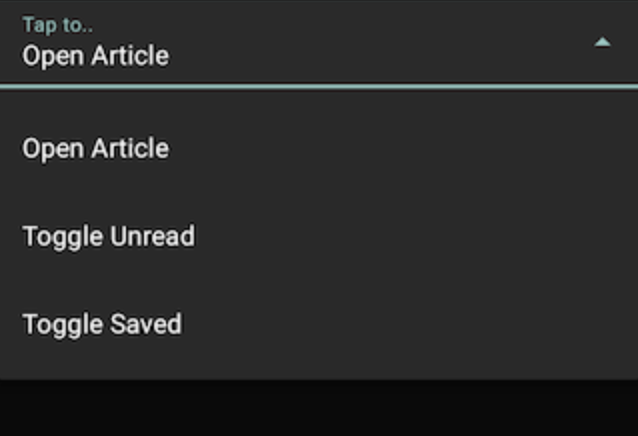
一方、Exposed dropdown menusとは、「現在選択中の選択肢が一番上に表示され、その下に選択肢の一覧が表示される形のメニュー」という理解をしています。
個人アプリでは現在選択中の要素も表示したかったので、Exposed dropdown menusを作りたいと思い、AutoCompleteTextViewを使うことにしました。
詳細や適切な説明については上記公式サイトをご確認ください。
実装例
material.ioにも実装例のコードが載っているのでそちらもご覧ください。 公式サイトを参考に、個人アプリではこのようなXMLを記述しました。 AutoCompleteTextViewは、styleを適用したTextInputLayoutで囲うことでExposedDropdownMenuの見た目にすることができます。
<?xml version="1.0" encoding="utf-8"?>
<androidx.constraintlayout.widget.ConstraintLayout
    xmlns:android="http://schemas.android.com/apk/res/android"
    xmlns:app="http://schemas.android.com/apk/res-auto"
    xmlns:tools="http://schemas.android.com/tools"
    android:id="@+id/container"
    android:layout_width="match_parent"
    android:layout_height="wrap_content">

    <com.google.android.material.textfield.TextInputLayout
        android:id="@+id/dropDownRoot"
        style="@style/Widget.MaterialComponents.TextInputLayout.FilledBox.ExposedDropdownMenu"
        android:layout_width="0dp"
        android:layout_height="wrap_content"
        app:layout_constraintBottom_toBottomOf="parent"
        app:layout_constraintEnd_toEndOf="parent"
        app:layout_constraintStart_toStartOf="parent"
        app:layout_constraintTop_toTopOf="parent">

        <AutoCompleteTextView
            android:id="@+id/dropDown"
            android:layout_width="match_parent"
            android:layout_height="wrap_content"
            android:inputType="none"
            tools:ignore="LabelFor" />
    </com.google.android.material.textfield.TextInputLayout>
</androidx.constraintlayout.widget.ConstraintLayout>
このような見た目になっています。
AutoCompleteTextViewの要素選択時の処理
個人アプリでは、要素を選択するたびにDBに選択肢を保存するような処理を行うよくあるような実装をするために、listenerをセットしました。
もともと、setOnItemSelectedListenerを呼び出してlistenerをセットしていましたが、なぜか要素を選択しても、リスナーが発火されませんでした。
原因を探すとそれっぽいものが
setOnItemSelectedListenerではなくsetOnItemClickListenerを利用するべきだというようなものでした。 実際にsetOnItemClickListenerを利用することで問題は解決しました。
AutoCompleteTextViewのjavadocを見てもどちらを使うべきかぱっと見ではわからないので、気をつけてください、という話でした。
    /**
     * <p>Sets the listener that will be notified when the user clicks an item
     * in the drop down list.</p>
     *
     * @param l the item click listener
     */
    public void setOnItemClickListener(AdapterView.OnItemClickListener l) {
        mItemClickListener = l;
    }
    /**
     * <p>Sets the listener that will be notified when the user selects an item
     * in the drop down list.</p>
     *
     * @param l the item selected listener
     */
    public void setOnItemSelectedListener(AdapterView.OnItemSelectedListener l) {
        mItemSelectedListener = l;
    }
以上となります。 誤った情報などもしありましたらコメントやツイッターにてご連絡いただけますと幸いです🙏
Reference
- Material.io: https://material.io/components/menus/android#exposed-dropdown-menus
- Android Developer: AutoCompleteTextView | Android Developers
- Stackoverflow: java - AutoCompleteTextView onItemSelectedListener does not work - Stack Overflow